TT010:
Sd.Kfz.250 Neue Art w. Pak 38 - 1/72
Scale
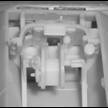
8) Next
connect the gun breech with the barrel and when dry, attach it to the gun
crucible: on the left hand side of the gun breech you will find a small depression which will
allow you to click it into position in the gun crucible, allowing you to move it. Glue is not necessary here.
Please read
these instructions before beginning assembly of this kit
1)Construction of the interior: fit parts 8, 11, 15, 18,
25 and 28 as well as P24, P30 and P32 as indicated in the Sd.Kfz. 250/1 instruction sheet. Do not use
parts 9, 12, 19, 21, 32, 33
2)Discard the upper hull (part 2) of the Sdkfz.250/1 and
instead use the new elongated upper hull as contained in the conversion. Mount parts 13, 24, 36 and
P1, P6, P7, P8, P10, P14, P26 and P27 to complete the interior of the upper hull. Finally attach P2 and P3
(rear hull and door) to complete the assembly. When this is completed you can glue it together with the
lower hull.
3)Mount this assembly to the lower hull and let it dry.
4)Now continue with the rest of the assembly of the Sd.Kfz
250: suspension, front wheels and tracks, lights, hooks, etc. Do not mount the MG gun shield or
rear swivel arm. Once this is finished you can start the construction of the Pak 38 gun.
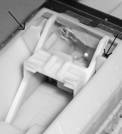
5) Carefully dry fit the two side panels as indicated with the arrows in the image as well as the gun platform. Once you are sure of their position glue them and let dry.
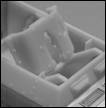
6) Next you can start the assembly of the Pak 38 gun. Start by attaching the two small traverse and elevation wheels to the gun crucible as indicated.
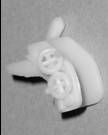
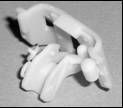
7) Next
glue the assembly made in step 6 to the gun shield as shown below. Once this
is finished connect it to the gun platform on the vehicle. Dry fit first as it is
important to do this correctly or the shield and gun will not align correctly with the hull making it look
funny.